從 WordPress 搬家到靜態網頁的一些小技巧
2023-09-22
最近正在幫一位朋友把他的 WordPress (WP) 網誌轉換成靜態網頁,當中發現了不少好用的工具和一些小技巧,在這裡紀錄一下
換成靜態網站的考量
轉換成靜態網頁需要改變寫作習慣,從以往使用 WISIYIG 編輯器變成 markdown;從線上寫作變成離線寫作;失去八成以上的 GUI… 但只要踏出這一步,換來的是幾乎免費的營運成本,以及可以隨心所欲地客製化,你的前端設計師也會很感激你 (我會) ( ゚ ∀ ゚) ノ ♡
把 WP 文章轉換成 Markdown
原生的 WP Export 工具並不會連同圖片 export,我們可以用這個 wordpress-export-to-markdown 取得文章和所有圖片
步驟一:使用 WP 內建功能取得 XML
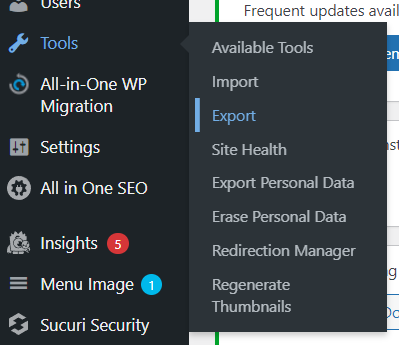
首先登入 wp-admin 後台,從左邊的選單選取 Tools -> Export
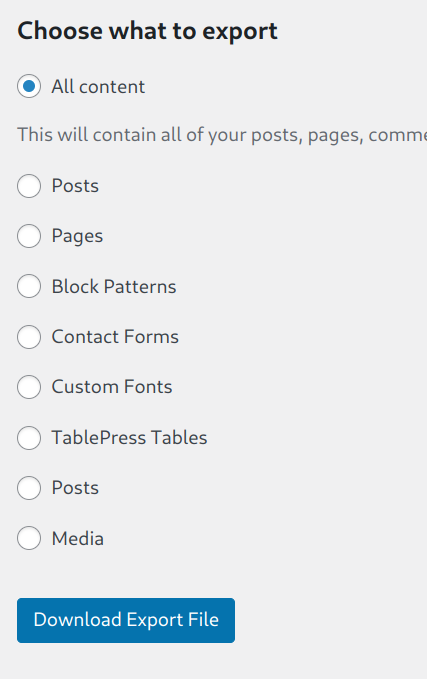
然後拉到最底,選取 All content,下載後會取得一個這樣格式的 xml WordPress.2023-09-16.xml
步驟二:運行 wordpress-export-to-markdown
Clone project 然後把剛剛下載的 xml 放到項目內方便使用
git clone https://github.com/lonekorean/wordpress-export-to-markdown.git

cd wordpress-export-to-markdown
cp ~/Downloads/WordPress.2023-09-16.xml ./export.xml

npm i
node .
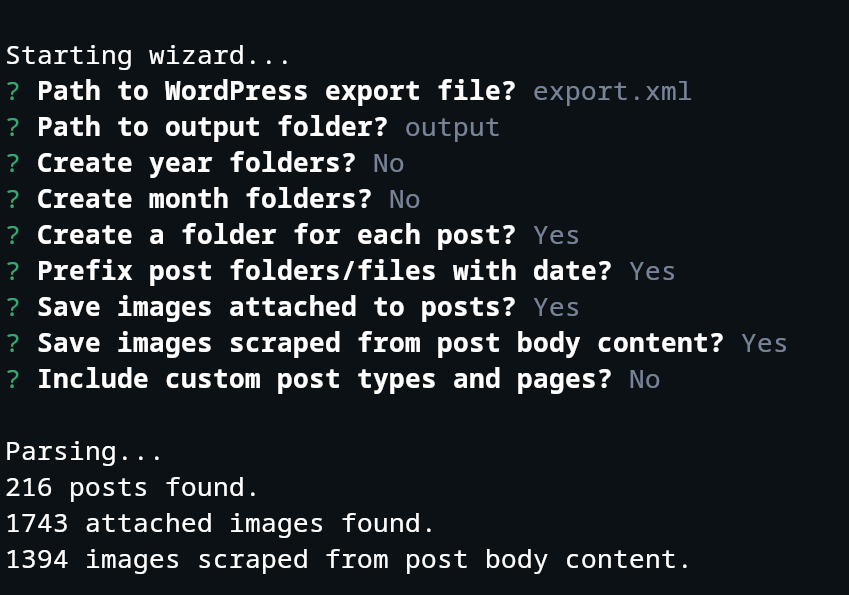
接著只要跟著 prompt 的指示,便可以連同圖片下載所有文章
下載的文章架構如下
├── output/
│   ├── 2023-01-01-first-post/
│   │   ├── index.md
│   │   └── images/
│   │       ├── thumbnail.png
│   │       └── image1.png
│   ├── 2023-01-02-second-post/
│   │   ├── index.md
│   │   └── images/
│   │       ├── thumbnail.png
│   │       └── image1.png
│   └── ...
├── ...
└── index.js
Front matter: YAML 轉換成 TOML
有一些 SSG 如 Zola,使用 TOML 相對比較方便批量更改 front matter,例如,在 TOML 我只需要在 categories 上一行加插 [taxonomies],但在 YAML 我則需要更改 categories 和 tags 的 indentation
TOML
+++
title = "The Lord of the Rings: The Fellowship of the Ring"
date = "2001-12-10"

[taxonomies]
categories = ["movie"]
tags = ["sci-fi"]
+++
YAML
---
title: "The Lord of the Rings: The Fellowship of the Ring"
date: "2001-12-10"

taxonomies:
  categories: ["movie"]
  tags: ["sci-fi"]
---
方法一:修改 wordpress-export-to-markdown
這個方法自由度比較高但需要改源碼,只要修改 src/writer.js 內的 loadMarkdownFilePromise(),便可以轉換成 TOML 的格式
async function loadMarkdownFilePromise(post) {
  let output = "+++\n";

  Object.entries(post.frontmatter).forEach(([key, value]) => {
    let outputValue;
    if (Array.isArray(value)) {
      if (value.length > 0) {
        // array of one or more strings
        outputValue = JSON.stringify(value);
      }
    } else {
      // single string value
      const escapedValue = (value || "").replace(/"/g, '\\"');
      outputValue = `"${escapedValue}"`;
    }

    if (outputValue !== undefined) {
      output += `${key} = ${outputValue}\n`;
    }
  });

  output += `+++\n\n${post.content}\n`;
  return output;
}
方法二:使用 Hugo convert
第二個方法就是安裝 Hugo 然後使用它的 CLI
hugo convert toTOML --output ./out
批量修改 front matter 順序
如果是用 Hugo CLI 的話 front matter 有機會變成按英文字母順序,例如下面這樣,如果插入 [taxonomies] 的話,那麼連 title 也會變成 taxonomies
+++
date = "2001-12-10"
categories = ["movie"]
tags = ["sci-fi"]
title = "The Lord of the Rings: The Fellowship of the Ring"
+++
我的方法是先批量插入 initial letter 作為 prefix,然後轉換成 TOML,確定順序正確後再改回原本的名稱,例如這樣:
---
a_title: "The Lord of the Rings: The Fellowship of the Ring"
b_date: "2001-12-10"
c_categories: ["movie"]
d_tags: ["sci-fi"]
---
如果會一點點程式語言,建議使用方法一,可以一次過在轉換的時候完成這些步驟
注意中文網址的 slug
很多 SSG 都會把文章名稱轉換成 URL slug,例如把 A title 轉換成 a-title,這樣做其中一個目的是有助提升 SEO
但並不是每種 slug 轉換工具都能夠支援中文字,有些能夠直接顯示中文(這樣就等於沒 slug 了),有些會變成拼音,最差的會直接顯示空白,因為我不能接受 魔戒首部曲 顯示為 mo-jie-shou-bu-qu,所以我傾向手動輸入 slug 或是直接停用這些生成器,如 slugify
當你使用一段時間後才發現的話,以後搬網址的時候就要連同這些網址一起照顧了,alias 會因此變得越來越多…
盡量不在 markdown 使用 shortcode
除非確定以後都不轉用其他 SSG,否則我會避免在 markdown 使用 shortcode,例如很多 SSG 都提供圖片處理的 shortcode,這情況我寧願用腳本或手動預先處理好這些圖片也不想交給 generator 去做,一來會拖慢 build 的速度,二來轉用其他 SSG 的時候要逐篇文章修改,十分費時
我曾經寫過這種的,還記得那時候搬家心裡一直在咒罵!所以說有時候這些工具對格式還是嚴格一點比較好…
{% asset_img image.jpg this is an image %}
結語
暫時想到就是這些了,希望能夠幫到有緣人吧 (^u^)